Do you want to learn to make wild fermented dill pickles from scratch? I’ll tell you how I do it. You’ll need cucumbers, water, salt and time, everything else is up to you!
Cucumber pickles are fun because they are so customizable. The flavors can be switched up by changing the spices and other additions in the recipe.
In this recipe I use the classic garlic, dill, pickling spice and chili flakes, but you don’t have to. If you like it spicy, add lots of chili flakes or even some sliced jalapeño. If you’re not a big garlic fan (if that even exists) just skip it or add sliced onion instead. You can make your own spice mix, seed spices work best. Turmeric is another great additional it will give the pickles a yellow tint like the chemical laden variety you can get from the store.

If it’s under the brine, then it’s fine.
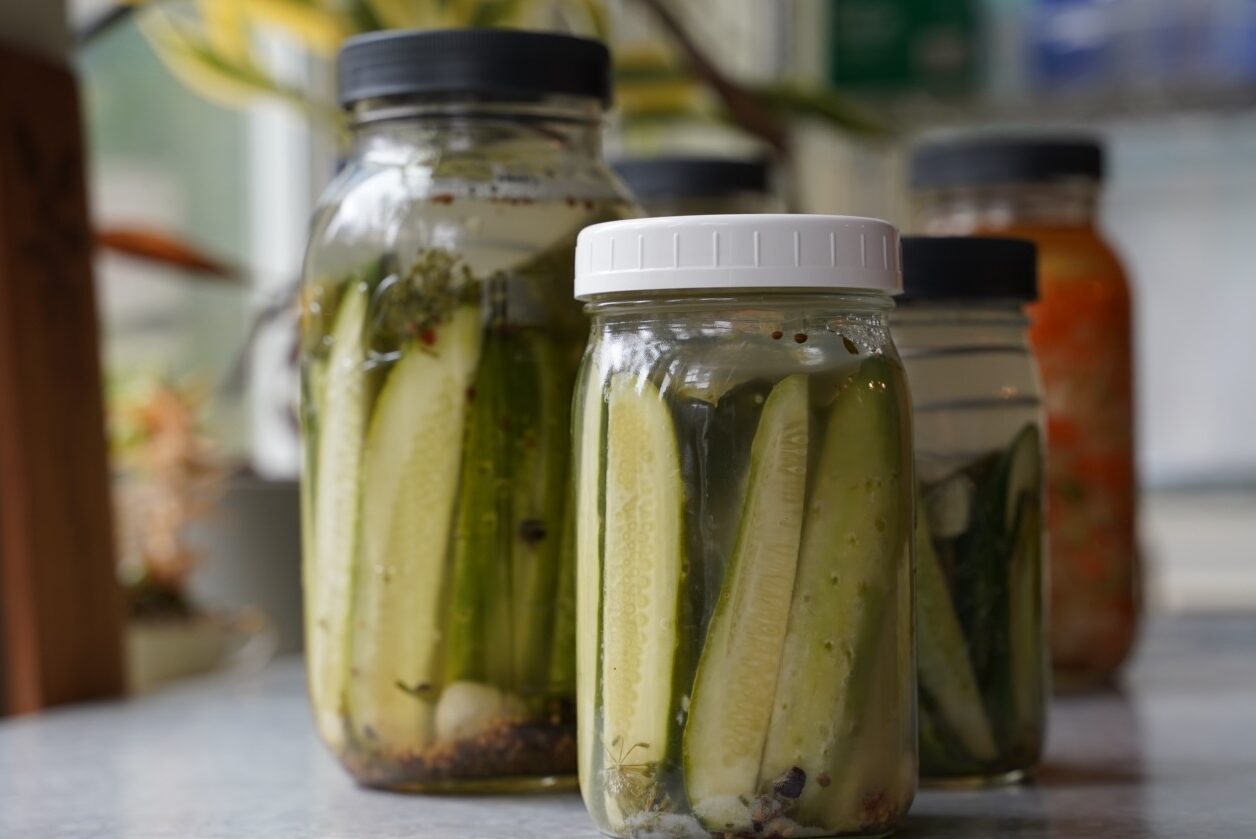
The key to success with fermentation is keeping the food submerged under the brine as it ferments at room temp. My favorite way to do this with small-ish batches is with the Ball Fermentation Lid and Spring Set. You can see this in use in many of my photos. The spring creates tension between the lid and food and keeps thinks tucked nicely under the liquid. The lid has a nice little spot for air to escape so you don’t build up pressure in your jar. They fit any wide mouth canning jar. I usually use a half gallon or a quart sized mason jar.
Raw, probiotic rich, naturally fermented cucumber pickles
Better than the best vinegar pickles, these wild fermented cucumber pickles are raw and never heated which helps maintain their satisfying crunch. A living, raw food loaded with probiotics and fresh taste. Wild fermentation is a wonderful way to preserve fresh vegetables. These pickles will last for a year or more in cold storage. It’s easy to learn how to make cucumber pickles and this recipe an be used with many other veggies other than cucumber. Carrots, green beans, snap peas and more.
This is as simple as leaving a jar of food on your counter. Probiotics grow at room temperate in an anaerobic (without oxygen) environment. If it’s under the brine, then it’s fine! Mold cannot grow without oxygen, so keeping your veggies under the liquid is key.
How to Make Fermented Dill Pickles
Equipment
- Vessel*
- Weight*
- Lid/Cover*
Ingredients
- Fresh Cucumbers
- Pickling Spice
- Real Salt
- Water**
- Fresh Grape Leaf***
- Garlic
- Fresh Dill (optional but great)
- Chili Flakes (optional)
How I Make Wild Fermented Dill Cucumber Pickles
- I gently smash and peel the garlic cloves. I use as much as I feel like. I really like garlic and used a whole bulb for this half gallon jar, but I never measure.
- I put few garlic cloves in the bottom of the vessel along with the pickling spice. I use 1 Tablespoon pickling spice per quart.
- I add some fresh dill when I have it. When I want spicier pickles I add some extra chili flakes.
- I place a grape leaf*** on the top of the spices.
- I pile in some whole pickling cumbers OR I use sliced cucumbers when making sliced pickles.
- I throw in some more garlic cloves and dill when layering in the cucumbers.
- I mix the brine – 1 Tablespoon of salt per 2 cups of water.
- I cover the cucumbers with brine and add another grape leaf*** on top.
- I place the weight on top of that leaf to keep everything submerged under the brine. This time I used the Ball Fermentation Lid and Spring Set.
- I add the lid from the fermentation set, but you could use a coffee filter or towel secured with a rubber band.
- I labeled the jar with the date and time.
- I will ferment these on the counter or shelf at room temp for 3-7 days****. I’ll start tasting at 3 or 4 days. They’re done when they taste good to you.
- I will move them to cold storage (my fridge) with a regular lid when they taste sour enough but are still crisp.
It’s all in the details
*A vessel can be a canning jar or crock. Really any glass or ceramic vessel big enough to hold everything and leave 1 or 2 inches of headspace. In this photo I am using a Half Gallon Ball Canning Jar.
*Use any weight that will keep the veggies submerged under the brine. A rock, a bag of pebbles, or buy one of these awesome Ball Lid and Spring Fermentation Sets that I use anytime I’m fermenting in a canning jar. They fit with any wide mouth canning jar and they’re cheap.
*The lid/cover should cover the vessel but allow gasses to escape. I often use a coffee filter or towel and a rubber band, unless I’m using the Ball lid and spring set, those come with a lid with a handy little vent.
**Use good water. Chlorine and fluoride will interfere with the bacterial process.
***If you don’t have a grape leaf you can use an oak, raspberry or blackberry leaf or any other leaf that contains tannins. Tannin helps keep your cucumbers crisp. It’s not necessary for fermentation, but makes for a better final product.
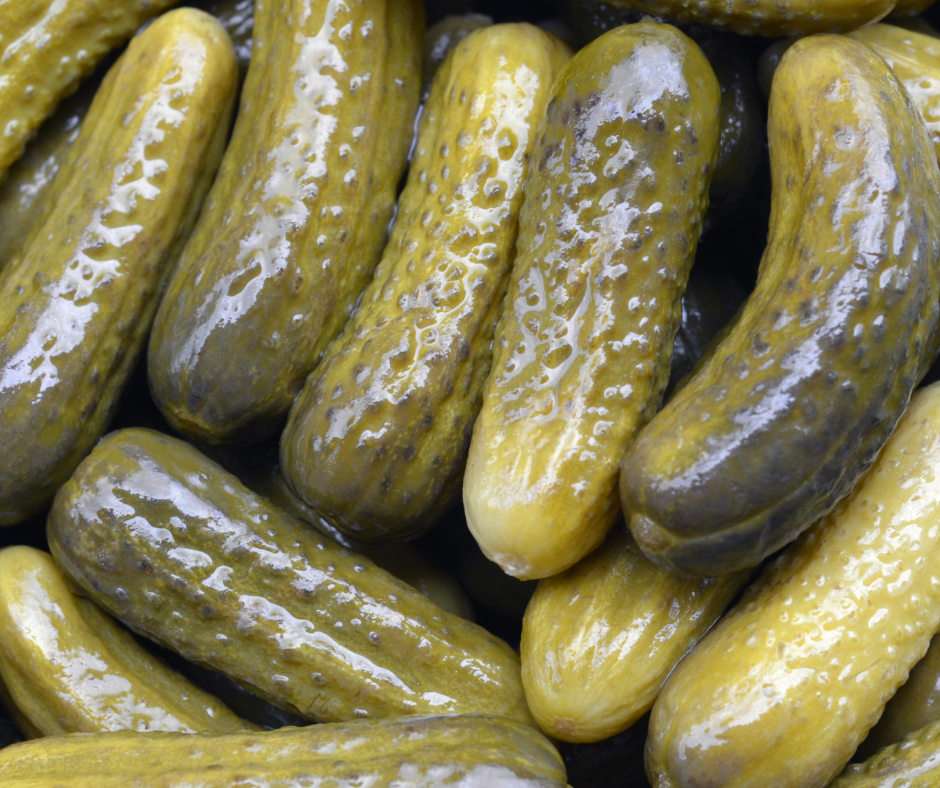
****You will most likely see bubbles after about 24 hours. They may increase for a time and then subside. The cucumbers will turn a dull, army type green and the brine will become cloudy. These are all signs of lacto-fermentation. They will also start to smell more sour/vinegary and like pickles!
Well, what are you waiting for?
You can do! I know, fermentation can be intimidating at first. It sure was for me. I was worried I would grow mold or worse yet make myself or my family sick. I needed to learn everything I could about this natural process and why it was safe.
Did you know that there has never been a case of food borne illness reported to the CDC from fermented vegetables? Really. It’s true. You can search the CDC’s website here. There have been instances of botulism when people have tried to ferment meat or tofu, but never from vegetables or fruit.
Why is fermenting vegetables safe?
Well, because the whole point of fermentation is to create an acidic environment. Botulism and other food borne illness cannot survive in an acidic environment. This natural process has its own built in protection. We start with a salt water brine and end up with a lightly salty liquid that’s close to vinegar.
To be extra sure that your food is safe, you can purchase these cheap pH strips on amazon here. Use these strips to text your brine. If it’s at or under a pH of 4.6 then it’s considered acidic and safe!
Shop This Recipe
Ball Lid and Spring Fermentation Set
Pinable Image


Fermented Dill Pickles
Equipment
- Vessel*
- Weight*
- Lid/Cover*
Ingredients
- Fresh Cucumbers
- Real Salt
- Water**
- Pickling Spice optional
- Garlic optional
- Fresh Grape Leaf*** optional
- Fresh Dill optional
- Chili Flakes optional
Instructions
- I gently smash and peel the garlic cloves. I use as much as I feel like. I really like garlic and used a whole bulb for this half gallon jar, but I never measure.
- I put few garlic cloves in the bottom of the vessel along with the pickling spice. I use 1 Tablespoon pickling spice per quart.
- I add some fresh dill when I have it. When I want spicier pickles I add some extra chili flakes.
- I place a grape leaf*** on the top of the spices.
- I pile in some whole pickling cumbers OR I use sliced cucumbers when making sliced pickles.
- I throw in some more garlic cloves and dill when layering in the cucumbers.
- I mix the brine – 1 Tablespoon of salt per 2 cups of water.
- I cover the cucumbers with brine and add another grape leaf*** on top.
- I place the weight on top of that leaf to keep everything submerged under the brine. This time I used the Ball Fermentation Lid and Spring Set.
- I add the lid from the fermentation set, but you could use a coffee filter or towel secured with a rubber band.
- I labeled the jar with the date and time.
- I will ferment these on the counter or shelf at room temp for 3-7 days****. I’ll start tasting at 3 or 4 days. They’re done when they taste good.
- I will move them to cold storage (my fridge) with a regular lid when they taste sour enough but are still crisp.
Notes
Are you new to Preserving Today? Learn more about me here. Preserving Today is formerly Greener Postures.
Leave a Reply